✅ Where to get all of those .env variables ? 😕
I got you covered man 👋
What is Supabase ❓
Supabase is a complete backend service that provides to Postgres database, authentication, instant RESTful APIs, and real-time subscriptions. It allows organizing data in a table format with the flexibility of running SQL queries.
Setup steps in Supabase If you do not have a Supabase account, create one here. The initial step to create a new database are:
- After logging in, you will be welcomed by the All Projects screen.
- Click New Project to create a new database.
- Choose an organization from the modal, enter the project's name, password of Project, select a region to host it, and then click the Next button.
After initializing a project in Supabase, you get the option to create a new table. We are using a custom data table for this documentation in a database called Books with custom data fields and values.
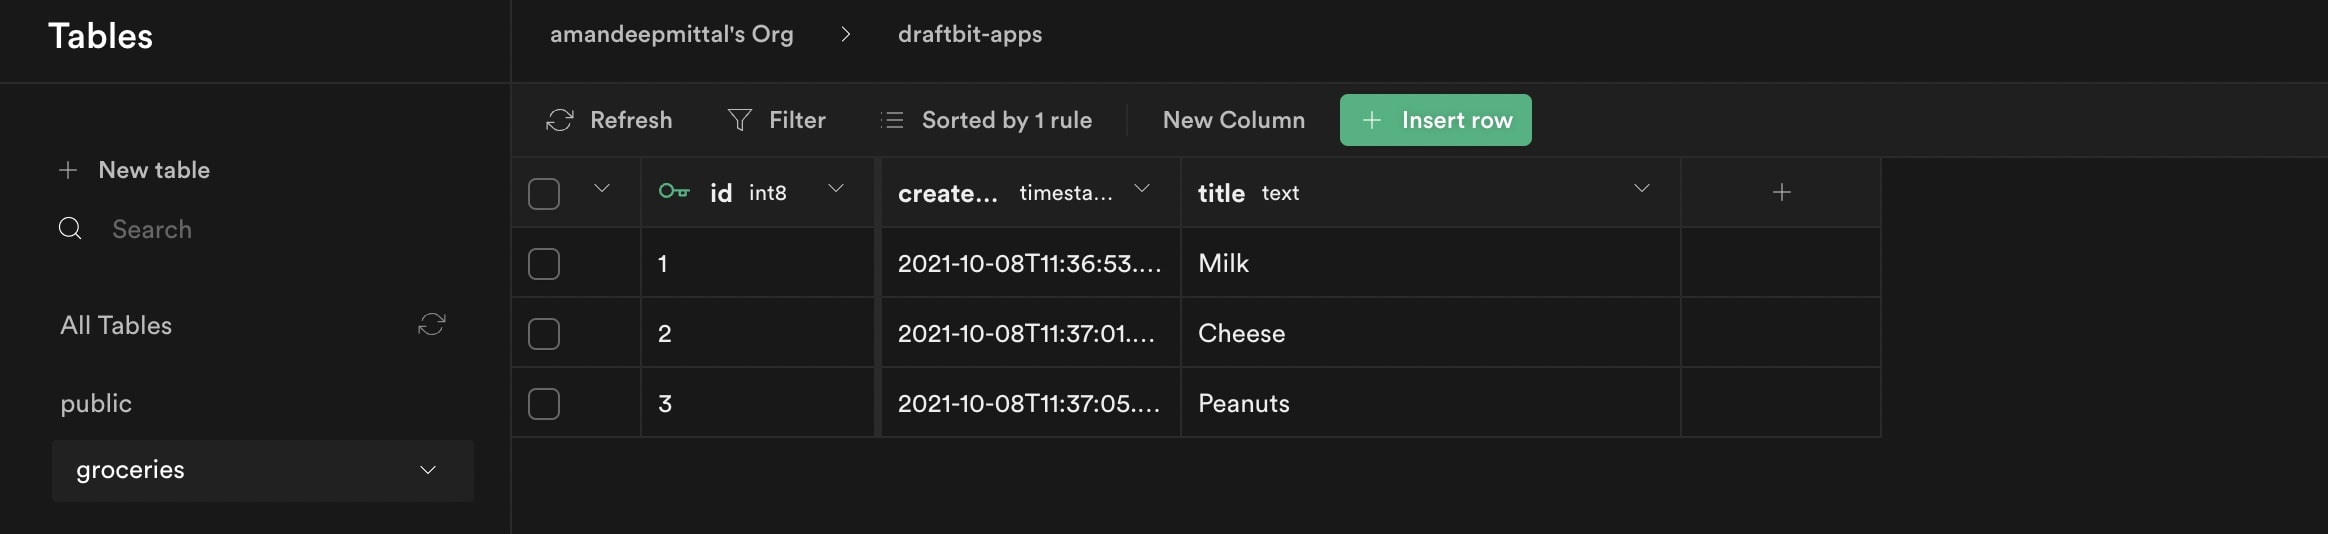
For this guide, we will use Supabase to create a data table from scratch. Here is how the example data table with pre-populated data looks like:
To utilize the data from the Supabase, let's use its REST API service. Supabase generates an OpenAPI spec for every table in your database. To connect the REST API in the Draftbit app, the following steps are required to be followed:
To connect the REST API in the Draftbit app, the following fields are required:
- Base URL of the REST API, which is in the format:
https://<your-domain>.supabase.co/rest/v1where the <your-domain is a unique domain name generated by Supabase. - The supabase-key is the secret key.
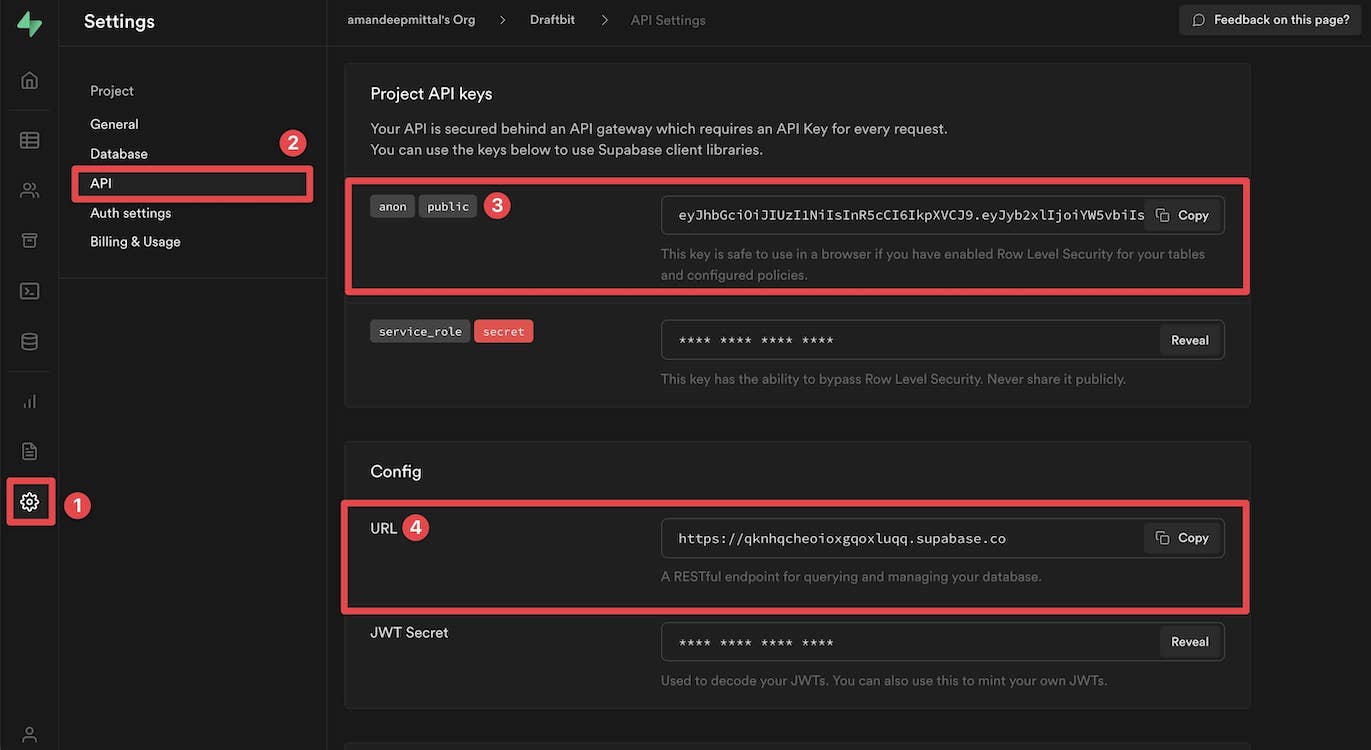
You can find these unique values in the API settings of your Supabase account.
- Click the Settings button from the top menu bar.
- In Settings, select API.
- In the Project API Keys section, select and copy the API key under anon. It will be required for every request made to the Supabase database.
- Also, under Config, select and copy the URL. It is the Base URL of your Supabase REST API.
After you have gotten both the AnonKey and API end Point go over .env file on your project and paste the keys as follows:
VITE_APP_SUPABASE_URL=`your supabase public api user goes here`VITE_APP_SUPABASE_ANON_KEY='your anon keys goes here'
And Your Supabase Connection code will be available at config folder named as supabaseClient.js :
import { createClient } from '@supabase/supabase-js'const supabaseUrl = import.meta.env.VITE_APP_SUPABASE_URLconst supabaseKey = import.meta.env.VITE_APP_SUPABASE_ANON_KEYexport const supabase = createClient(supabaseUrl, supabaseKey)
What is Clerk ❓ ✅ Clerk helps developers build user management. We provide streamlined user experiences for your users to sign up, sign in, and manage their profile.
Below is an example of your .env To get the respective keys, go to the API Keys page in the Clerk dashboard.
VITE_APP_CLERK_PUBLISHABLE_KEY='your keys goes here'